This tutorial describes the usage of the program CoppeliaSim. In particular, the use of the software in the context of the course “Cyber-Physical-Systems” is discussed.
Download and setup of the program
CoppeliaSim can be downloaded from this website. Furthermore, the Python package “msgpack” must be downloaded via pip. Depending on your operating system, different steps are required after the installation.
Windows 10
For Windows 10, no further installation steps are necessary. However, to use the B0-based remote API, some .dll files must be available in the working directory. These can be found in the installation folder of CoppeliaSim. To shorten the search for the files, you can find all the required files in the GitHub project linked below.
Ubuntu 20.04
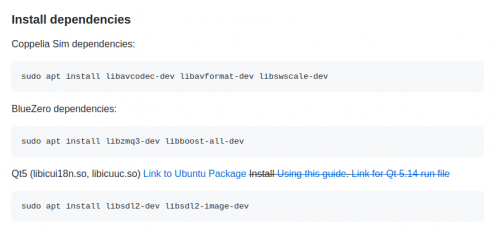
Before CoppeliaSim can be started, dependencies for the BlueZero API have to be installed. To accomplish that follow the instructions bellow.

In contrast to Windows, CoppeliaSim must be started from the terminal on Ubuntu. To do this, right-click on the unpacked folder and select the option “Open in Terminal”. Then enter the following command “./coppeliaSim.sh”. After confirming with the Enter key, CoppeliaSim starts. To use the B0-based remote API, the file “libb0.so” must be available in the working directory. For some simulations, additional files must be added in the same directory, these can also be found in the GitHub project linked below.
CoppeliaSim and B0-based remote API - Python Client
As described above, depending on the operating system, .dll and .so files need to be added to the workspace. Besides the operating system specific files, the Python scripts “b0.py” and “b0RemoteApi.py” must be present in the working directory. These files can be found in the installation folder or in the GitHub project. For the task of the course, the following two applications are most important: actuation, sensing. Sample code for actuation and sensing can also be found in the GitHub project. In the following section, their application is briefly discussed.
Actuation
Using the API, Two movement modes are implemented in the provided scene “scene_with_pandas.ttt”. These are used with the method “simxCallScriptFunction” in Python because they are programmed as a function in the simulation file. The following modes are available:
- – pts: In this mode, the angular positions of the joints and the corresponding time are passed to the simulation as a list (all intermediate points are interpolated). This mode is important for control tasks and if the inverse and forward kinematics have been developed by the user.
- mov: In the “mov”-mode, the positions and speeds of intermediate points are transferred to the simulation. The inverse kinematics of Reflexxes Motion Library type II or IV is used in this mode.
Sensing
At the beginning, the object handles of the observed objects must be determined, this is done with the help of the method “simxGetObjectHandle”. To execute this method you need a so-called topic, more about this down below. Since “simxGetObjectHandle” only needs to be executed once, and only at the beginning or before the simulation, the topic “simxServiceCall” is used.
Afterwards, the joint angles or joint positions can be streamed with the help of the method “simxGetJointPosition” and the position of the end effector with “simxGetObjectPosition”. To achieve this, a callback function is needed for each angle or for the coordinates (one for each xyz triplet). These callback functions are called cyclically and can be used, for example, to store the angles in an array. Finally, it must be noted that the sensor data should always be saved with their time, otherwise no meaningful calculations or diagrams can be made.
As with the actuation, sample codes are available in the GitHub project.

