Getting started with Pytorch using Cuda acceleration
This tutorial gives an instruction on installing Cuda and enabling Cuda acceleration using Pytorch in Win10. Installation in Linux or Mac systems are all possible. An additional .py file will verify whether the current computer configuration uses the Cuda or not. The following instruction assumes that you have already installed Python IDE, e.g., Anaconda, Pycharm, Visual Studio…
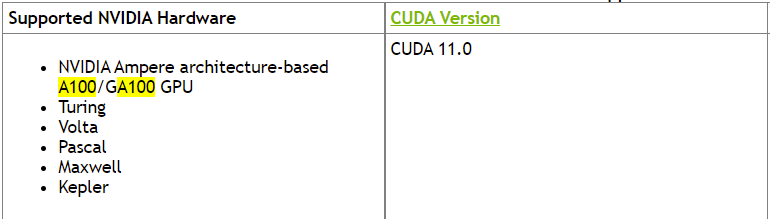
Step 1: Check which Cuda version is supported by your current GPUs under this website. From the left figure, we can see that A100 supports Cuda 11.0. It is also reported from other blogs/ forums that A100 can support Cuda 11.1. In this post, we install Cuda 11.1.
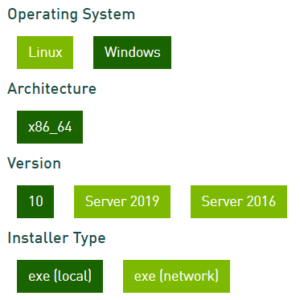
Step 2: Download Nvidia Cuda Toolkit 11.1 (the same version as Cuda in Step 1) from the website. In Win10, for instance, we follow up the choice as shown right. The size of exe(local) is around 3.1GB. After downloading, run the .exe and perform installation. It may take some minutes to complete installation.
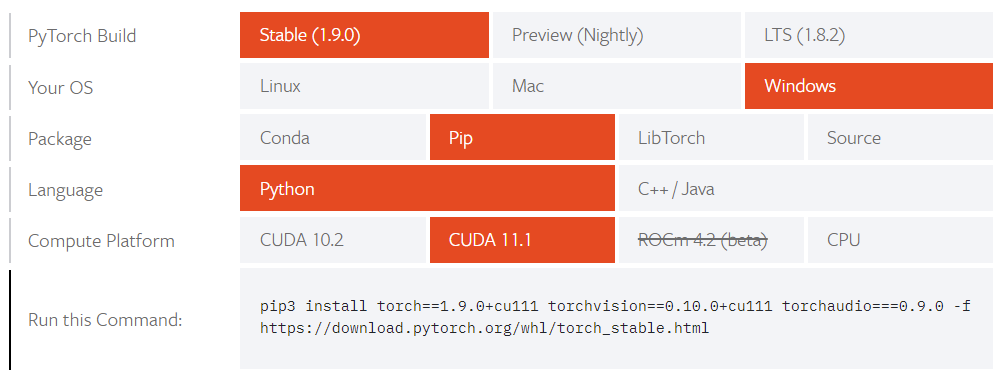
Step 3: On the homepage of Pytorch, choose the appropriate options as shown in the left figure. IMPORTANT: The cuda version must be the same as in Step 1. It is also recommended to use Stable version. After finishing the , copy the command into Anaconda Powershell Prompt or other command prompt where you install packages for Python. Waiting for the installation, which may require larger than 1GB disk space and takes some minutes for installation. You could also find historical version of Pytorch in that homepage.
Verify your installation with .py file
You could download a cuda-test.py file and run it. If the result shows ‘cuda’, then you can enjoy the Cuda acceleration for training neural networks!
Using Multiple GPUs for further acceleration
Running Pytorch with Multiple GPUs can further increase the efficiency. We have 8 GPU cards and can be used parallely for training. Please refer to (1)(2)(3) for details.